14 - Page Layout
The following files are required for this lesson:
Introduction
This walkthrough is done in two parts:
Demo Instructions
You can follow along with your instructor to complete this build and/or you can use this document as a guide in completing the demo build.
Steps – Part 1: Center Page Framework
- Download the demo-center-page-framework.zip file and extract its contents to a folder called center-page-framework.
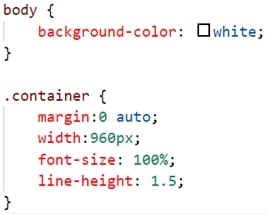
- In the css folder add a stylesheet named styles.css.
- In this file add the following code:

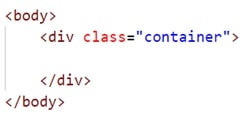
- Open the index.html file and make the following change in the
<body>which will use the class created in the stylesheet:

- Save this center-page framework as it will be used in future examples, exercises, labs, and assignments.
Steps – Part 2: Demo Page Layout
- Download the demo-page-layout.zip file and extract its contents into a folder named demo-page-layout.
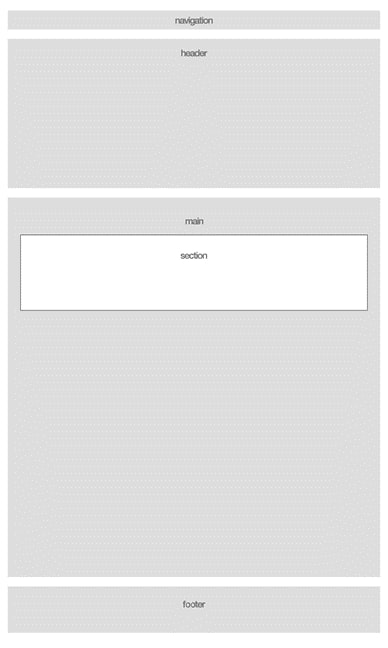
- The download contains an image of the completed web page:

- The steps to achieve the above result require you to make the following additions to styles.css (the comments in the code below are optional but recommended)
- Change the font styling:

- Style the <nav> element:

- Style the <header> element:

- Style the <main> element:

- Style the <section> element inside the <main>:

- Style the <footer> element:

- Change the font styling:
- Save and run/refresh index.html in your browser. If your resulting web page does not look like the supplied wireframe, make any necessary code corrections, and refresh your browser.
Exercise Instructions
There is no related exercise for this walkthrough.
Lab
Download the lab-page-layout.zip file from Moodle. The completed web page should look like the compted.jpg file supplied. Submit this as per the instructions on Moodle.